Native L2TP/IPSec VPN for Mac OSX
To use Identity Cloaker service through Mac OSX native L2TP/IPSec VPN please follow this tutorial.
Choose Apple menu (![]() ) > System Preferences, and click Network.
) > System Preferences, and click Network.
Select your VPN service in the list.
If there is no VPN connection listed, then click ![]() over the lock icon, and in the menu "Interface" pick VPN, and VPN type L2TP/IPSec, click "Create".
over the lock icon, and in the menu "Interface" pick VPN, and VPN type L2TP/IPSec, click "Create".
Add server address: uk12.identitycloaker.net
(for UK12 server, without "http://" and "/" after)
Account name is your Identity Cloaker username (all in lowercase), click "Apply".
(The screenshot displays my username "jasek99" but you have to enter your own)
.jpg)
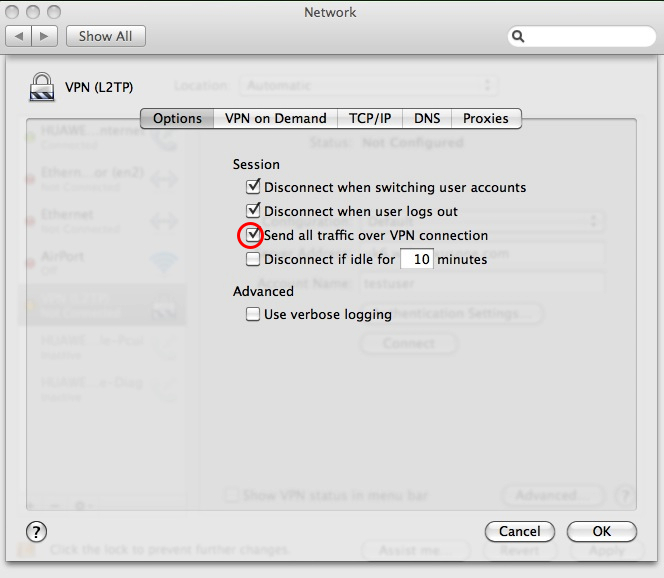
Go to "Advanced/Options", and check "Send all traffic over VPN connection", click OK/Apply.

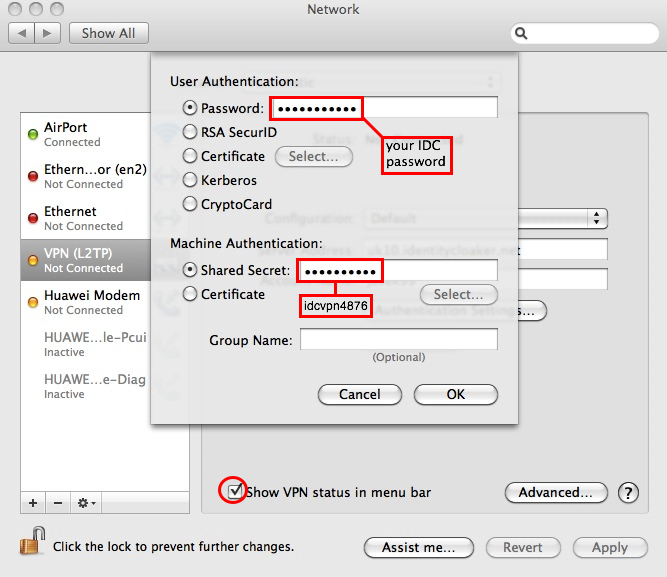
Go to "Authentication Settings", enter your Identity Cloaker password (case sensitive) and shared key/secret: idcvpn4876 (please, enter in lowercase), without certificates; click OK/Apply.

Click "Connect".
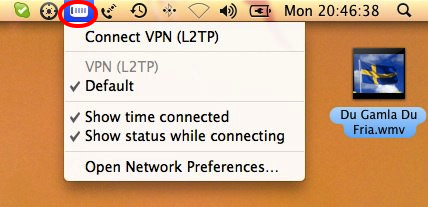
You may check "Show VPN status in menu bar", and use the menu bar icon as shortcut.
Available IPs:
AU2, CA2, CH1, CZ1, DE2, FR5, IE4, NL2, SE2, IT2, PL1, ES1, UK4, UK7, UK8, UK9, UK10, UK11, UK12, UK13, UK14, US3, US4, US5, US6, US7, RU1, NO1, PT1, AT1
Updated version of our servers list can be found at your member area.
To access them, replace the "uk12" part in uk12.identitycloaker.net with any of these.
If you have checked the option "Show VPN status in menu bar". Then you can disconnect through tray icon in the right top of desktop.
